How To Make A Festive Piñata

Introduction

 
Image result for pinata
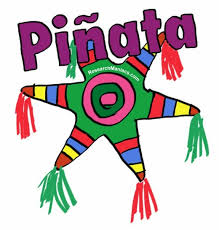
  Image result for pinata

Let's explore how to make a piñata! 

Image result for making a pinata

No matter how much time goes into making a piñata, its decorative qualities are only temporary! 

Image result for making a pinata

Stuffed with candies and goodies, the piñata is created so children can break and smash it apart...

Eagerly looking for the contents to spill out so they can collect and enjoy the variety of different treats!!!

Question #1:  Read the following literature and find out when did the idea of breaking a container filled with treats first come to Europe:

http://en.wikipedia.org/wiki/Pi%C3%B1ata
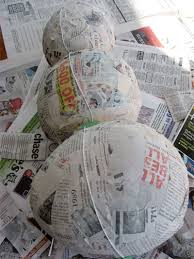
Image result for making a pinata

YOU WILL ALL BE PLACED IN GROUPS OF THREE...

CREATE A UNIQUE PINATA USING WHICHEVER TISSUE PAPER AND DECORATIONS YOU PLEASE!

BE SURE TO MAKE IT VIBRANT AND COLORFUL....

AS THIS IS PART OF THE MEXICAN TRADITION!!!

Task

Image result for making a pinata

The task is simple.  Create your personal piñata by following the instructions given.  You will need to have the following materials:  

Approximately one 14-inch balloon  and.....                                                

  •                       Cloth tape                                                          
  •                       Scissors                                                          
  •                       Newspaper, cut into 1-by-6-inch strips                                                          
  •                       Wheat-paste powder                                                          
  •                       Strong white paper (20-pound copy paper works well)                                                          
  •                       Spray mount                                                          
  •                       Compass                                                          
  •                       Craft glue                                                          
  •                       Tissue paper in several colors                                                          
  •                       Rotary cutter (optional)                                                          
  •                       Self-healing mat (optional)                                                          
  •                       Utility knife                                                          
  •                       Large needle or piece of wire                                                          
  •                       Tissue-paper streamers                                                          
  •                       Strong cord                                                          
  •                       Candy, treats, and small prizes, for stuffing                                                          


Image result for making a pinata

Question #2:  What is the difference between a simple piñata and a structured piñata  Read the following and find the response!

http://pinataboy.com/make-your-own/

Process

Follow the Steps In This Order:  (May get a bit messy, to be prepared to cover your working station with newspaper)

      • Step 1 - Inflate the balloon, and coax it into a round shape by wrapping it with cloth tape. Set it aside.                    

      •          

Image result for making a pinata

                                   
  • Step 2

    Make paste: In a medium bowl, mix 1 cup wheat-paste powder with 4 1/2 cups water. Dip newspaper strips one at a time into the paste, and place them on the balloon, overlapping the strips slightly, until the balloon is completely covered. Let dry overnight. Repeat this process twice more for a total of three layers.

           Image result for making a pinata             

    •                                       
  • Step 3

    Our pinata design calls for six cones; to make them, cut six sheets of strong white paper into 7-inch squares. In a well-ventilated area, spray-mount different colors of tissue paper onto the squares. Place the point of a compass at the corner of one of the squares, and mark a 6 1/2-inch arc. Trim the paper around the edge of the arc. At 1/2-inch intervals, cut 1/2-inch-deep notches into the rounded edge. Roll the paper into a cone, and glue or tape the straight edges together where they meet. Cut 1/2 inch off the tip of the cone to create an opening for streamers. Fold the notches outward, and using craft glue, adhere the cone to the pinata. Repeat with the remaining cones, gluing the first two cones at opposite ends and spacing the remaining cones evenly around the sphere's center perimeter.


    Image result for making a pinata

                                              
    • Step 4

    For the fringe decoration, begin by cutting tissue paper into narrow strips about 3 inches long and 1/2 inch wide. A rotary cutter and a self-healing mat will enable you to cut through several layers of tissue at one time. Fold each strip lengthwise, creating a 1 1/2-inch strip, and cut the strip down the center from the open side, up to within 1/2 inch of the folded edge. Each strip should yield four "fringes." Starting at the bottom of the pinata, glue the strips, fringed edge up, in a tight circle. Glue a second row above the first one (the circle will be slightly larger), tucking the glued portions of the second row behind the fringe of the first. Work your way up the pinata, gluing rows of fringe in circles of increasing size. Glue a couple of rounds of tissue paper over the fringe at the top and bottom of the pinata.


      Image result for making a pinata

                                            
        • Step 5

          To complete the pinata, use a utility knife to cut a small trap door near the top. Make two vertical cuts 3 inches apart, and connect them with one horizontal cut at the top to create a flap; fold the flap back. Using a piece of wire or large needle with a length of strong cord attached, punch two holes at the top of the pinata, and pull the cord through the holes. Knot the cord above the pinata, leaving enough to use for hanging.


        •   

      Image result for making a pinata

                                            
      • Step 6

        For a final touch, twist 10 streamers together for each cone; apply a dab of craft glue to the twisted end, and tuck it into the small hole at the end of the cone. Repeat this for each of the cones. Fill the pinata with a selection of candy, treats, or prizes; push the flap back into place, and hang your pinata.

      Question #3:  How would you go about making an animal shaped piñata instead of a star shape?

      Read the following link and record your answer:  http://entertainment.howstuffworks.com/how-to-make-toys3.htm

      Image result for making a pinata

      Evaluation

      Weak

      1

      Unsatisfactory

      2

      Satisfactory

      3

      Strong

      4

      Ability to Follow Instructions Given Student was verbally reminded more than 5 times to be on task.  Student was reminded 3 times to be on task. Student was reminded once to be on task. Student was not reminded to be on task.
      Proper Use of Materials: Student did not use the materials given in an appropriate manner. Student used the materials given in a somewhat appropriate manner. Student used the materials given in a mostly appropriate manner. Student used the materials given in an appropriate manner.
      Appropriate use of Time Student did not manage their time correctly. Student did not manage their time correctly, and their piñatas were not completed. Student mostly managed their time correctly, and their piñata was created. Student managed their time correctly, and their piñata was created.
      Student followed the Safety Procedures Student broke more than 3 of the 5 safety rules posted on the whiteboard during the project. Student broke more than 2 of the safety rules posted on the white board during the project. Student broke 1 Safety rule posted on the white board during the project. Student broke 0 safety rules posted on the white board during the project.
      Conclusion

      Conclusion


      Congratulations on creating your perfect piñata! Now you can enjoy yourself by throwing a "fiesta" and enjoying your masterpiece!!!

      Things to Think About:

      1. Can you remember the steps to make a piñata?

      2. Is this something you can make at home?

      3. Is this process something you can teach to others? (Your friends or family?)

      4. Did you enjoy your piñata? Why or why not?

      Question #4:  Every ton of paper recycled saves how many trees on this earth? 

      Read the following link and record your answer:http://www.mykidsadventures.com/how-to-make-a-pinata/

      Image result for pinata

      Teacher Page

      Teacher's Page

      I prepared this web quest as a way to have my Spanish Level 1 students review all of the different step in making their very own piñata.  It is also a way to be sure the students are engaged in the culture of Mexico and not just focus on the Spanish language!

      Image result for pinata

      Source URL:  https://www.createwebquest.com/fdileo/createafestivepiñata

      Image result for pinata